Saturday, April 30, 2022

Cackling Stitches Creepy Critters BOM - May

It's the first of the month so that means a new block or two for the "Creepy Critters" BOM at Cackling Stitches. I love joining my wicked friends, Joan from Moosestash Quilting and Carla from Creatin' in the Sticks, to make these blocks. Check out the new blocks on our Facebook page, Cackling Stitches, HERE.

This is my version of "Creepy Critters" 


Here's how the BOM works at Cackling Stitches:

The BOM will run from February 1st to August 30th.
On the 1st day of each month we will release block patterns that will be free until the next block(s) is released.
Once new blocks are released, the previous month's blocks will no longer be free. They will be available in our Etsy stores at a cost of $2.
On September 1st the entire pattern will be combined and sold in our Etsy stores for $10.
We hope you appreciate the time we put into creating the BOM quilt and understand that we are keeping the costs to a minimum. If you're quick to get the patterns during the month they are free, there will be no cost to you.

February - Rotary Rita can be found in my Etsy store, HERE.


March - Petey the Poltergeist by Joan can be found in her Etsy store HERE.


March - Jackie the Jockey by Carla can be found in her Etsy store HERE.

April - Tabitha by Joan can be found HERE.

April - Boo The Black Cat by Carla can be found HERE.

May - Melvin the Mummy by Joan can be found HERE


May - Frankie Lights the Way by Carla can be found HERE

We'd love to have you join us!

Monday, April 25, 2022

Benartex "Judy's Bloom" Project Hop

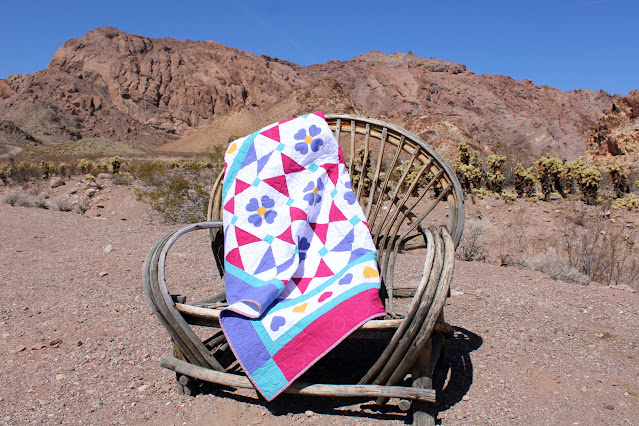
You all know I love blog hops, so this project hop by Benartex is totally ringing my bell! Especially with the 
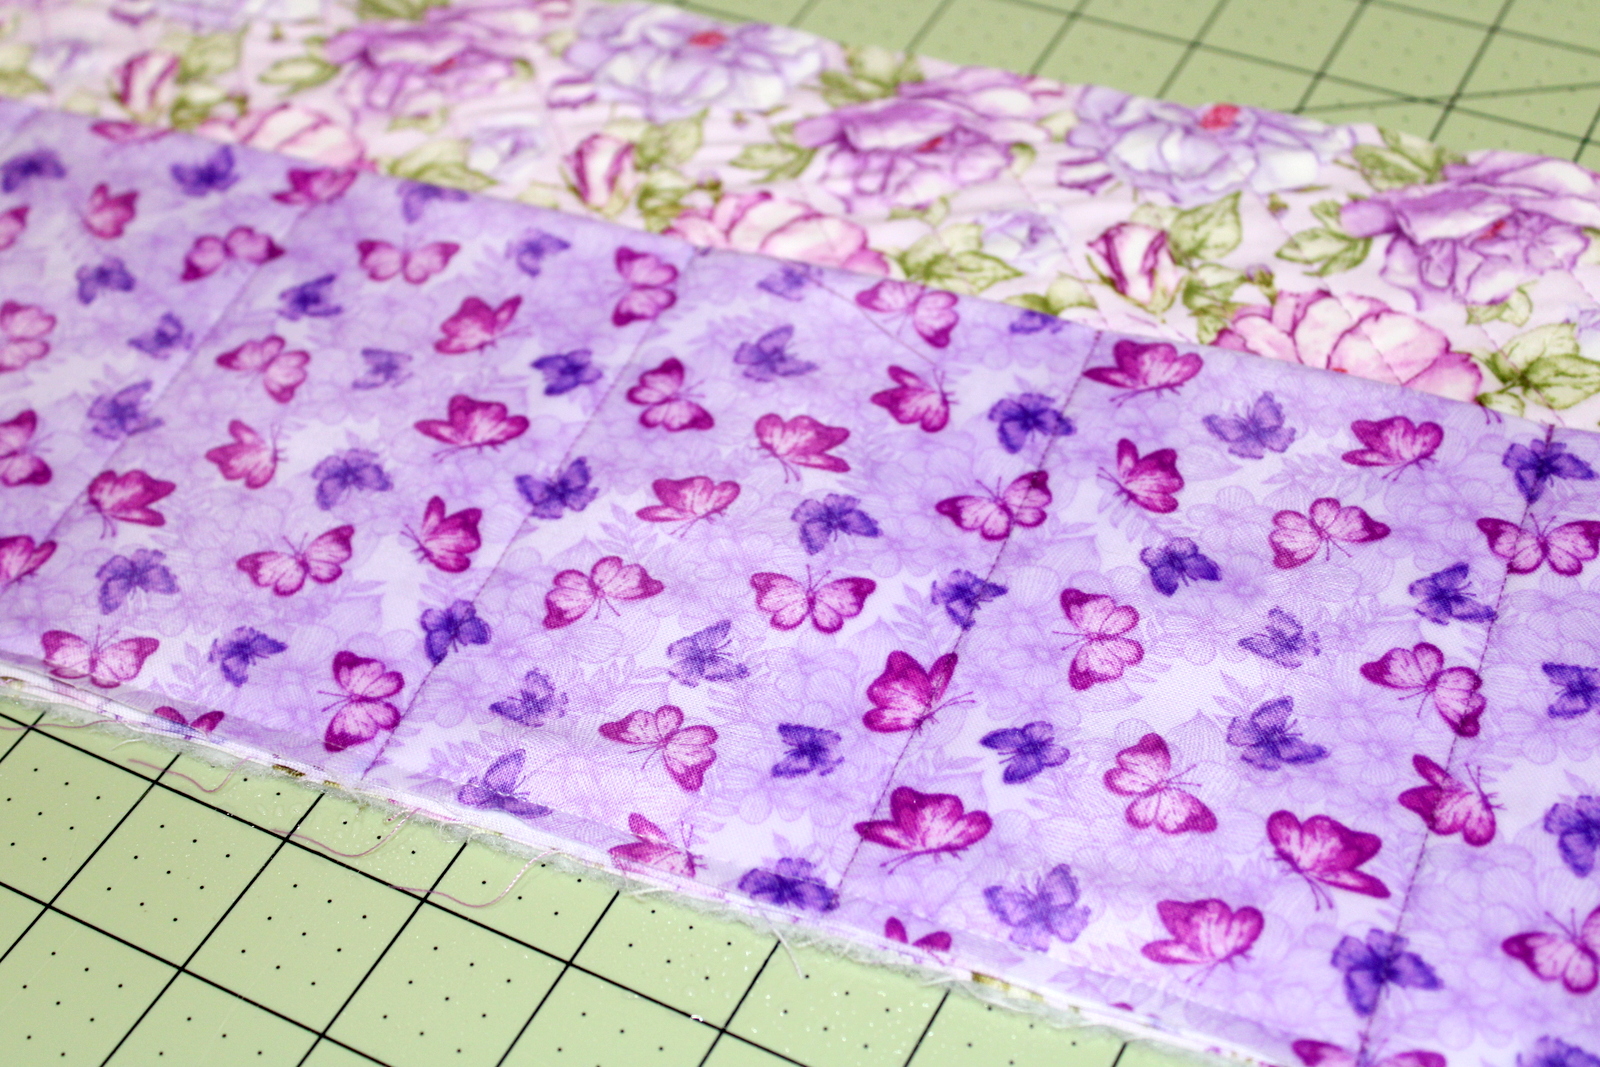
"Judy's Bloom" fabric by Eleanor Burns being showcased...it's gorgeous! It is full of purples, pinks, greens, and butterflies, too. Perfect for any of your spring sewing projects!

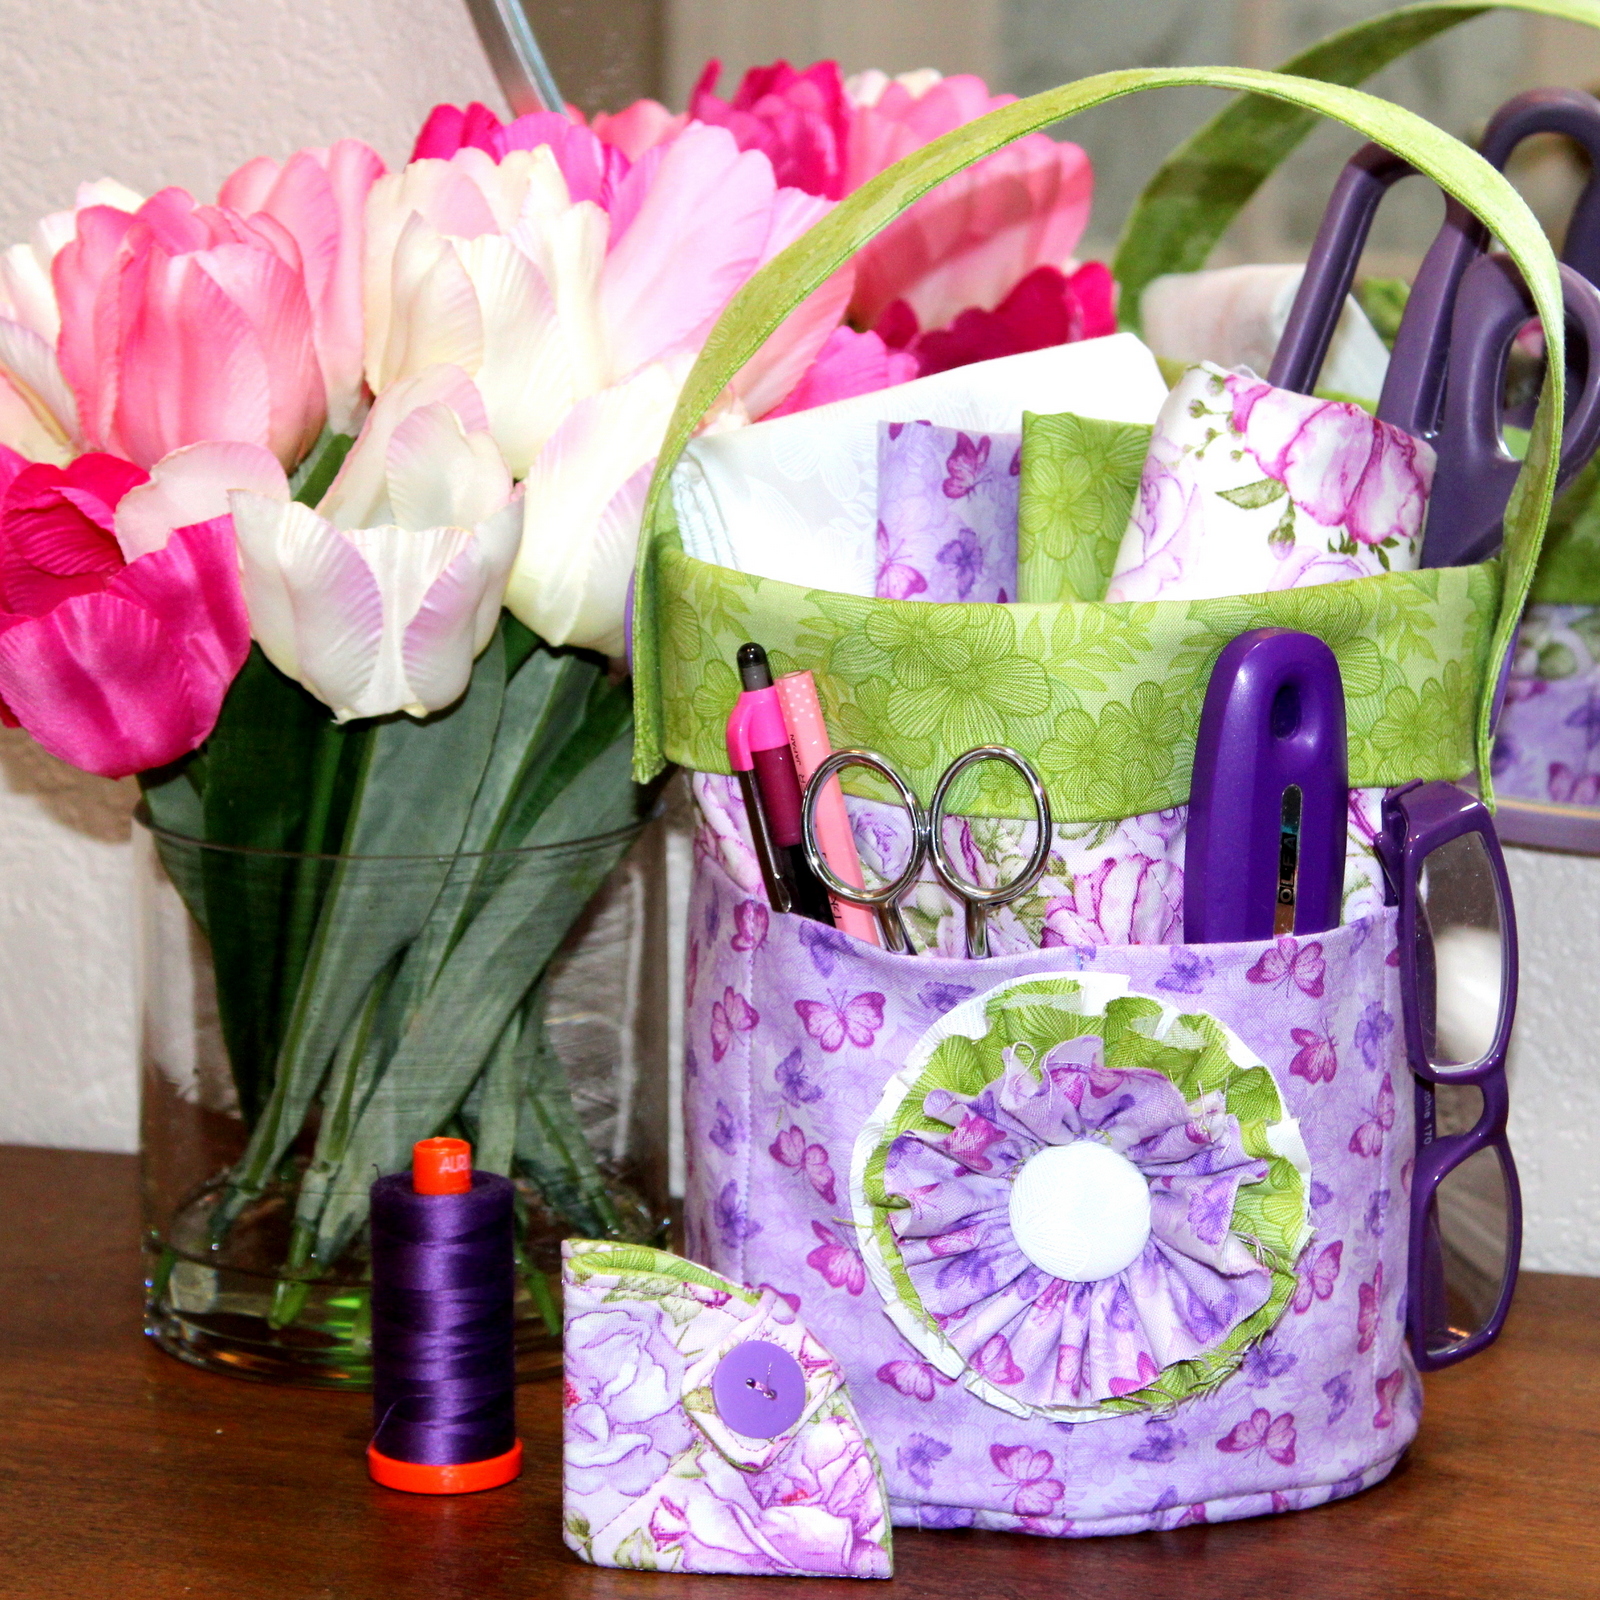
I updated and changed a pattern I made several years ago to sew this tote and needle holder using "Judy's Bloom". It's a small round tote with a tiny needle holder. Both are really easy to make!

Little Round Tote
& Tiny Little Needle Holder


Fabrics used in this tote and needle holder:

Benartex “Judy’s Bloom” by Eleanor Burns

Blossom Lavender, SKU# 13550-62 

Lace Green SKU# 13555-40 

Roseland Lavender, SKU# 13551-62 

Crochet White, SKU# 13554-09 

Butterfly Lavender, SKU# 13553-62 


Having a tote with pockets is great for taking your sewing tools to any retreat or to have sitting by your sewing machine. It holds a lot of things for being so small!


The main tote section is made from "Judy's Bloom" Blossom Lavender and was quilted with
Stitch n Sew High Loft Fleece between two layers of fabric to add strength to the tote. 
It stands up on it's own!


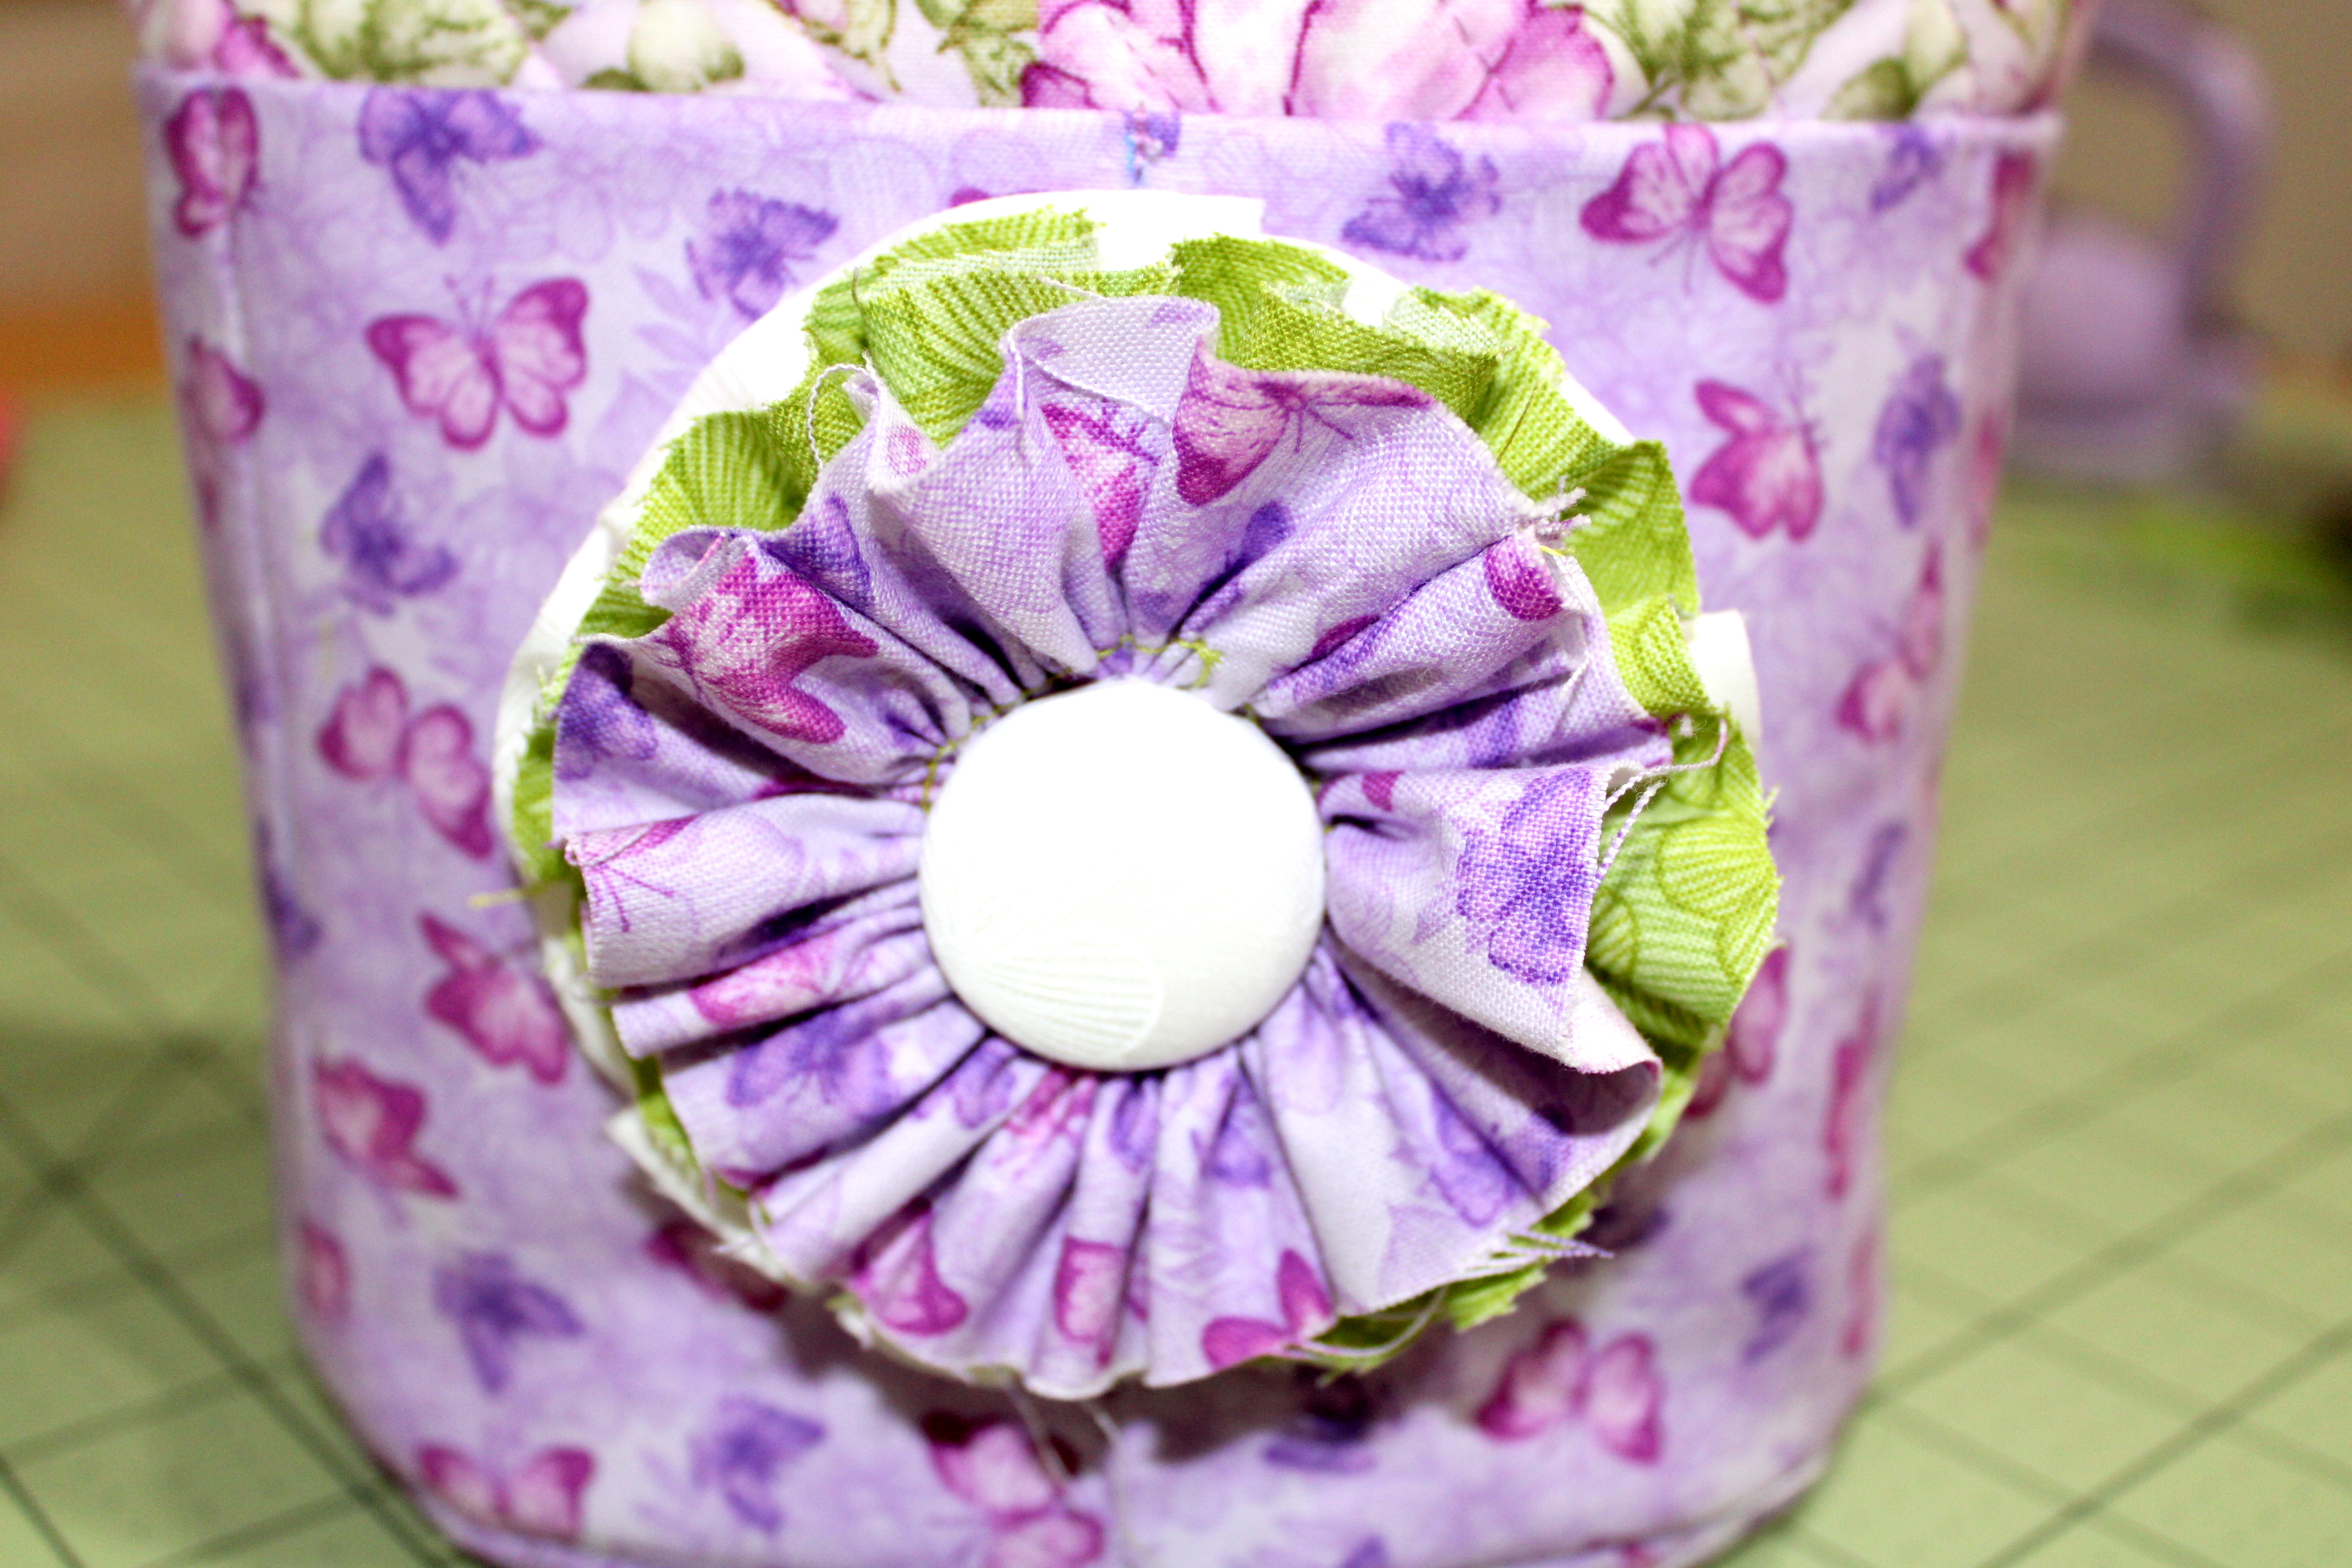
The pocket was made with "Judy's Bloom" Butterfly Lavender and is sectioned
off to hold so many of your favorite sewing tools.


The tote is lined with "Judy's Bloom" Roseland Lavender.


The cuff and handle of the tote used "Judy's Bloom" Lace Green...it is such a pretty green color!


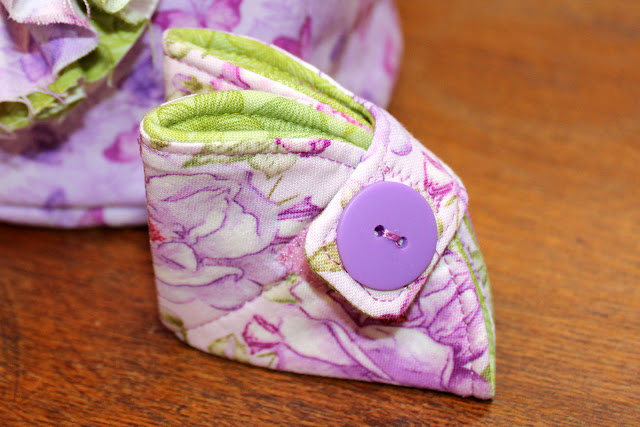
The Gathered Flower on the front of the tote is meant to fray on the edges and still look lovely. It's easy to put together and add to the front of the tote!

Gathered Flower


Supplies 
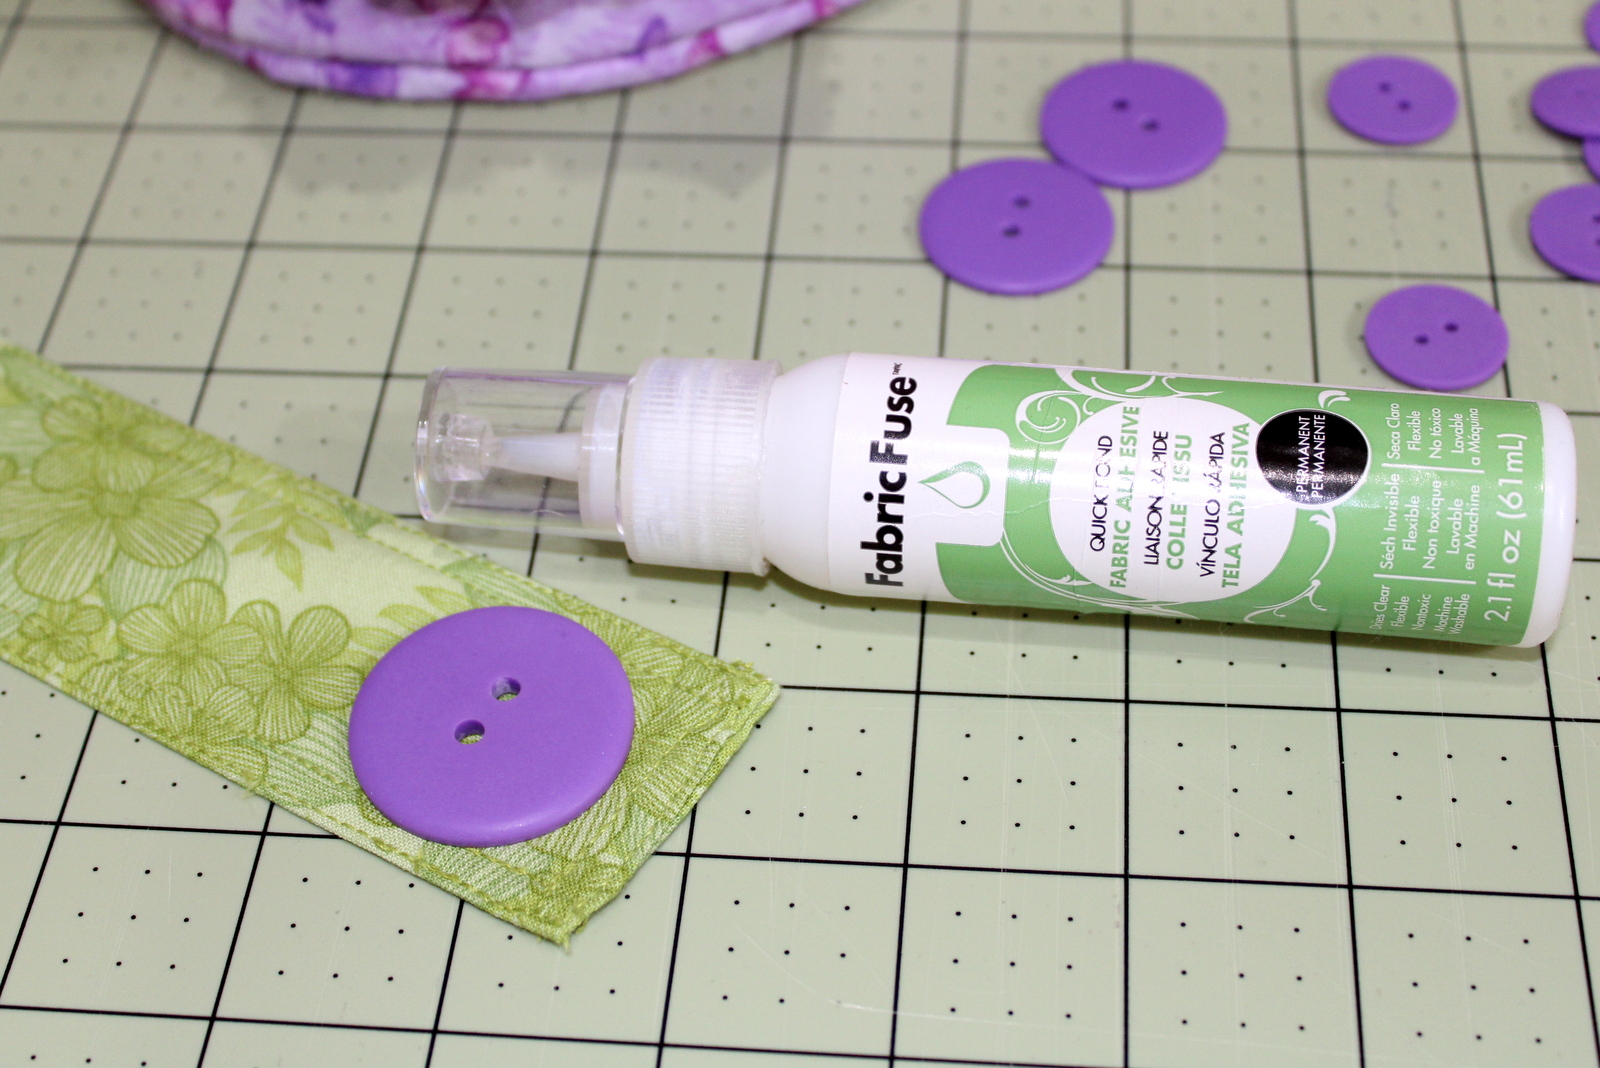
needed: 1/8 yard of three different fabrics; thread, 1 ½” button, fabric glue


Cutting instructions: Cut 2 – 1 ½” x 20” strips; Cut 1 – 1” x 20” strip


Sewing instructions:


Step 1: Baste 1/4” from left edge to 1/4” from right edge on each strip. Pull end threads to gather.


Step 2: With right sides together, sew short ends together. Repeat with each strip to create three gathered circles.


Step 3: Stack circles with 1” strip circle on top. Hand baste circles together in the center.


Step 4: Place flower on bag and baste or glue in place. Sew button to bag covering gathers.


Tip: Use iCraft Liquid Fabric Fuse near the center to hold the flowers together. Let dry before sewing. Glue the flower on to the bag along with the button. Let dry before sewing it in place on the tote.


Buttons sometimes wiggle around when you're trying to sew them on. 
Not a problem if you use fabric glue to hold it in place until you're ready to sew!


The same is true for gluing the strap in place and then sewing it on the tote.
It's always in the correct spot.


I've made this same needle holder many times, but in a bigger size. This time I went for a smaller one to tuck either in a pocket or attach to the outside of the bag with a metal ring.

Tiny Little Needle Holder


Stitch n Sew High Loft Fleece went between the layers...no felt needed for this little cutie!


You can find the Little Round Tote and Tiny Little Needle Holder HERE


Giveaway now closed
Benartex is generously offering one "Judy's Bloom"fat quarter bundle for us to giveaway.
How awesome is that!


Giveaway is limited to United States participants only.
One entry/comment per person.
The fat quarter bundle will be shipped from the Benartex warehouse.
Must be 18 or over to enter.
Giveaway ends on April 30th at midnight PST.
Winner will be randomly selected and announced after April 30th.
Good luck!

WINNER, WINNER, WINNER! RANDOM NUMBER 19 WINS!

scottylover said...

Love the needle keeper! I need to make some of those to have in my office at work. I always seem to pull a hem out of my pants and not have a needle and thread around! The tote is adorable, too.

There are more projects to be seen on these wonderful blogs.
Check them out!


5/25 - Benartex - Fabric Feature
5/26 - Carol - Just Let Me Quilt (this is me!) 
5/26 - Tammy - Tamarinis
5/28 - Sandra - MMM Quilts
5/29 - Benartex Free Pattern

Thank you so much for stopping by!


Tuesday, April 19, 2022

Sweet Dreams Baby In Benartex Warp And Weft

It is gingham week on the ThermOWeb so thanks to Benartex, I was able to make "Sweet Dreams Baby" using their gingham from the Warp & Weft by Modern Quilt Studio fabric line. 

48" x 60"


What is Warp & Weft? Warp and weft refer to the horizontal and vertical lines in the weaving process. The threads on a loom that are parallel to the selvedge are called warping. The perpendicular threads are called the weft. 


WHAT YOU NEED:

Heat n Bond Lite Iron-on Adhesive 

Stitch n Sew High Loft Fleece 60” wide

Spray n Bond Basting Adhesive

Aurifil Thread

Oliso iron

Optional: Crafter’s Edge Crossover with 2 ½” x 2” heart die and 1 ½” circle

Benartex Warp & Weft and Benartex Superior Solids


An Oliso iron is a great tool for using Heat n Bond Lite Iron-on Adhesive on your applique projects.


Another great tool for sewing is the Crafter's Edge Crossover II and cutting dies. "Sweet Dreams Baby" hearts were cut using this awesome machine and heart and circle die! (The pattern includes the heart and circle if you don't have a cutting device.)


Iron Heat n Bond Lite Iron-on Adhesive to wrong side of fabrics; let cool. Following Crafter’s Edge instructions, place paper side of adhesive facing up on platform*. Cover as directed before running through machine. Run die and fabric through machine. Peel off paper liner from the backs of applique pieces. Place applique, adhesive side down, on right side of fabric. Press according to package directions until entire piece is bonded. Let cool. Sew around edges of applique using a straight, zig-zag, or blanket stitch. *To reverse the direction of design, place fabric side up before cutting.


I love that ThermOWeb has Stitch n Sew High Loft Fleece 60” wide for bigger projects. It is lighter than cotton batting and is perfect for a baby or summer quilt.


Quilt assembly with Stitch n Sew High Loft Fleece 60” wide and Spray n Bond Basting Adhesive:

Protect the area where you will be working by placing an old sheet or paper under and around the area you’ll be spraying. Place the batting on work area, smoothing to remove wrinkles. Place the quilt backing, wrong side down, on top of batting. Smooth to remove wrinkles. Having the batting a bit larger than the backing is suggested.


Roll back about six inches of the quilt back to expose some of the batting. Using the basting spray, spray batting from one edge to the other. Carefully lay the wrong side of quilt backing over the sprayed surface of batting. Smooth fabric to ensure it adheres to the sprayed fabric and remove any wrinkles. Roll back the rest of the quilt back to continue spraying and smoothing about six inches at a time until you reach the bottom of the quilt back. Check for creases or folds you might have missed.


Turn backing and batting over to have batting facing up. Lay quilt front, wrong side down, on batting. Make sure quilt front is lined up correctly; smooth out wrinkles. Use the same spray and smooth method as the backing. 


Trim edges and square-up quilt. Quilt as desired and add binding.


"Sweet Dreams Baby" was quilted with Aurifil's Berrylicious variegated thread #4647.


You can find the pattern for "Sweet Dreams Baby" in my Etsy store HERE.


Photos were taken at the Nelson Ghost Town in Searchlight, Nevada.


There were two crew members at this photoshoot!


Carla from Creatin' in the Sticks and I had a great time when she visited Las Vegas.
We got our husbands to hold quilts while we visited Nelsons Ghost Town. They were awesome!


Carla was just as cute and amazing as I thought she'd be.


Don't forget to visit the "Wonderful World of Color" blog hop that's happening this week!


Monday, April 18, 2022

A Wonderful World Of "Space Race" Color Blog Hop

Today is my day to hang out in Moosestash Quilting's "Wonderful World of Color" blog hop and with Joan as the hostess, this week is going to rock with amazing inspiration! Thanks, Joan!

Joan's challenge was simple: The sky is the limit. Color, world, lets face it anything fits this theme, don't you think?

I got excited about Benartex's new fabrics, "Space Race" by Painted Sky Studios, and thought they definitely fit the "world" and "color" part of this challenge. The fabrics are beautiful and the colors are bright!

"Space Encounter"
54" x 66"


My quilt back is Shadow Blush Twilight Blue in 58" wide fabric.


There are several panels available, including this one that is approximately 24" x 57".
(This was trimmed to a smaller size to fit the quilt)


Gorgeous panels to choose from!


Love the gradients and planets in these fabrics.

The spaceman's applique fabric was Cotton Shot Licorice and Cotton Shot Wedding Pearl.
It has a nice sparkly shine to it.
 

There was a space encounter with a little green guy!


A little out-of-this world church visit isn't a bad idea, especially when it's as cool as this
one at Nelsons Ghost Town. The stained glass behind the quilt is beautiful.


You can find the pattern for "Space Encounter" HERE.

This fabric really called my name with all the beautiful colors in it, so with a little leftover I made a mini quilt. I had no idea that aliens made quilts and had UFO's in their spaceship like we have in our closets. 


The photo crew was awesome!


You can find the pattern for "Space Encounter" HERE.

Be sure to check out the other "Wonderful World of Color" bloggers:

Monday April 18

 Tuesday April 19


Wednesday April 20

 Thursday April 21

 Friday April 22


Check out this article at Porch by Cassandra Rosas, "Decorate Your Home with Crochet, Knitting,
 and Quilting: The Experts Tell Us How to Do It" HERE to see my answer to this question: 

How do you design a quilt inspired in a holiday season, what is the creative 
process and where do you get your inspiration?
 

Give It A Whirl Blog Hop Starts Today

It is time to whirl, twirl, and spin with the "Give It A Whirl" blog hop! What was the challenge? Somewhere in or on your project ...