
When new fabric from Benartex arrives on my doorstep, I love the process of figuring out what to do with it. This beautiful array of their "Harvest Festival" by Kansas Studios was easy to be creative with!
The fabric has metallic accents that give off an amazing sparkle when the light hits them. These are the fabrics I used, along with Benartex's "New Hue" basic line fabrics.

Here are more of the "Harvest Festival" fabrics and the "New Hue" colors I used.

Years ago I made a Thanksgiving table runner that I loved, but felt it needed some changes and updating. "Harvest Festival" gave "Thanksgiving Turkey Escape" a bolder look.
"Thanksgiving Turkey Escape"
15" x 45" table runner

This turkey knows it's time to escape the farm!


The truck may be empty of pumpkins by the time it gets to the farm and diner.

Does applique scare you or seem a bit hard? I don't like to do anything the hard way,
so here's a few tips on how I do my applique projects.
Tracing or printing?
I trace big applique pieces on large sheets of Heat n Bond iron-on adhesive, but I really prefer to print them using my inkjet printer. Heat n Bond has some printable sheets that make copying designs so easy. No pencil needed!
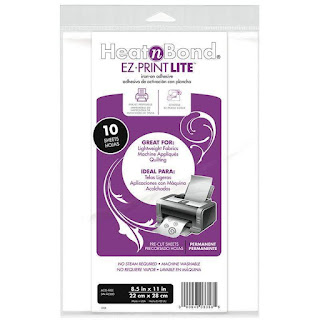
Trace or print applique designs on smooth side of iron-on adhesive. Make sure designs are reversed so they will be the correct direction when ironed on fabrics. (This pattern already reversed the applique designs.)
Cut around traced applique designs leaving at least a quarter inch from solid line. Hint: Writing the desired fabric color on the paper applique piece can avoid confusion when ironing to fabric.

Iron applique designs (rough side down) to wrong side of fabrics following package directions. Let cool.

Cut out applique pieces on solid lines. I like to cut my pieces out on a tray so I don't lose any of the tiny designs. Those purple Karen Kay Buckley's Perfect Scissors with serrated blades have become my new favorite for cutting out applique.

TIP 1: Ironing a lightweight interfacing on the back of applique blocks adds stability when stitching around fabric pieces. It can shrink the fabric about 1/4" so it is suggested you iron it on before you cut the fabric to required size or see TIP 2.

TIP 2: Cutting the background fabric 1” larger for applique blocks allows for shrinkage. Trim blocks to correct size after stitching around applique designs.
TIP 3: A heatproof sheet is a great tool for assembling the pieces before ironing them to your fabrics. This one is available in most craft or quilt stores, and on Amazon.

*If available with your pattern, place the full size applique key underneath the sheet. Tape or use a glue stick if pieces indicated needing to be placed together. If it doesn't come with a full size key, don't get shook up about having the pieces in exactly the same position as the pattern photo. As long as they overlap slightly as indicated, it's okay if they are more left or right than the original design.
.jpg)
Peel off paper liner from the backs of applique pieces. Follow design keys for correct placement. Place cut out applique designs on the heatproof sheet and lightly press them in place (do not do it for too long.) Make sure they slightly overlap if indicated in the keys.

Continue layering designs from the back to the front.


Let cool...this step is important! Carefully peel off the applique from the sheet and place it, adhesive side down, on right side of background fabric. Press according to package directions until entire piece is bonded. Let cool.

Repeat with remaining applique blocks following pattern directions.

*The truck block needs sashing between two blocks before adding applique.
Some of the pumpkins are added after borders are sewn on.

What thread color and weight should I use?
You can choose thread that is the same color as your fabric if you want it to blend and not stand out. Black thread definitely defines applique more. Flowers can look more delicate if you use the same color thread, but darker colors can give them a bolder definition. It's entirely up to you! Audition a couple different ways if you can't decide.
The weight of the thread depends on how much you want it to show. You can use 50, 40, or even 28 weight thread...the smaller the number, the heavier the thread. Aurifil 50 weight black thread was used for applique on this table runner.
Does bobbin thread have to match the thread on top?
If you're using black thread for all the applique, use black thread in the bobbin. If you'll be stitching the applique pieces with thread that matches the fabric, use a white or beige thread in the bobbin but be sure to lessen the tension so the bobbin thread doesn't pull up.
Does raw edge applique have to be blanket stitched?
Raw edge applique can be sewn down with a blanket stitch, straight stitch, or even a zig zag stitch. Whatever stitch you use, place the needle in the down position while appliqueing to keep fabric from moving when you pause or turn corners. Take a few straight stitches along edge of applique and then begin blanket stitching (or the stitch you choose.) A slow to moderate speed is best to keep stitches accurate. Once you master the blanket stitching, you will find that you can go faster.
Do stitches have to be all the same size or type?
Not at all! When stitching around small applique pieces or pieces that come to a point, it is good to shorten the length a little. That way you don't just see stitches, you can see the fabric. You can also use straight stitching around some of the smaller pieces that would be too difficult with blanket stitching.

Do accents or lines have to be embroidered by hand?
Nope, but if you're good at it, go for it. You can free motion or straight stitch decorative lines with a sewing machine.

Once you've appliqued, stitched, and sewn on borders, quilt and add binding using your favorite method.


